Thursday, March 27, 2014

Part 4 - Feeling Alright (OK)

So coming back in this morning I realized that I made a mistake. I suggested that you use Network Discovery to detect your topology, when Forest Discovery is the magic method. I updated the post to suggest that, but anybody who read right away saw my blunder. Fortunately, Forest Discovery is VERY fast. When I made the correction, I saw the topology in seconds, not minutes or hours, like it takes to reboot the server.

Look at all that blur!
Since we have boundaries, this is a great time to set up the groups. Groups assign the ranges and domains to the site server. This is very important, and easy to overlook. I was so focused on getting the boundaries right, that I never took that next step in creating the groups, which prevented me from moving forward. No wonder it took a month to get started.

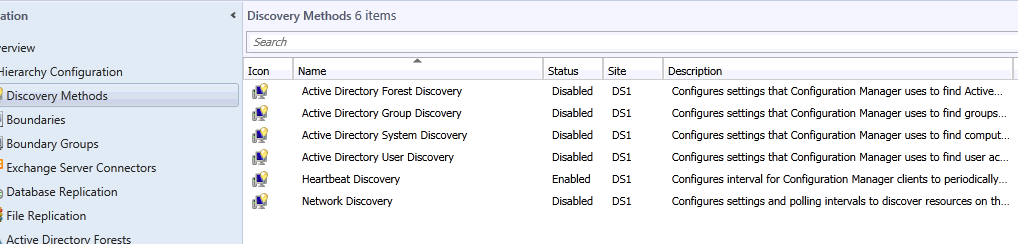
On the Administration group, expand Hierarchy Configuration, and right-click Boundary Groups and click Create Boundary Group. Give the group a name. Description is optional. Click Add. Check all the appropriate boxes.

Domains and Subnets
After those are added, click the References tab, and check "Use this boundary group for site assignment." If this is your primary site, it'll already be selected. On the bottom click Add and check the FQDN for the site, then OK your way out of the Create Boundary Group. This will assign the site server to the domains you've discovered. 

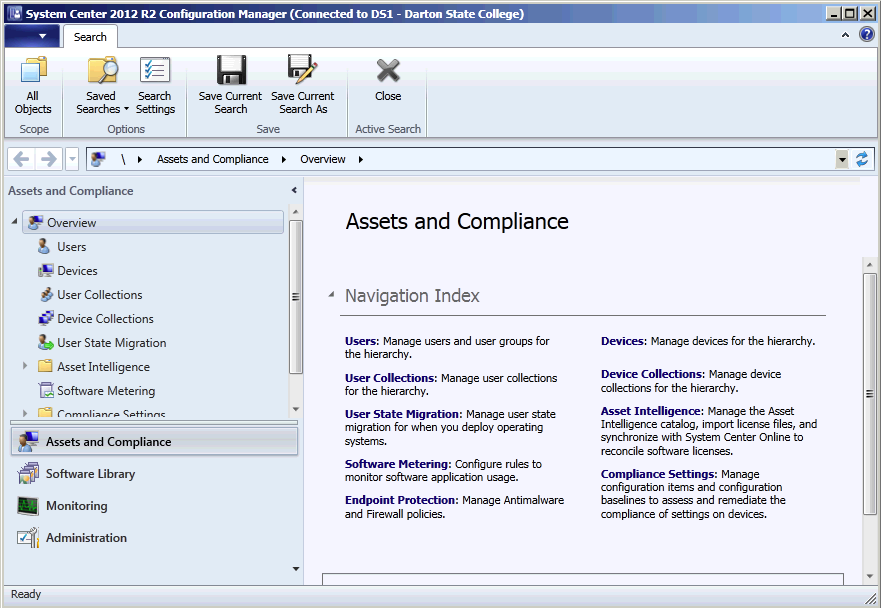
Pulling it all together
Tip time! Another part of all this discovery and boundary setting that I found really useful later on in my last experience with SCCM was Distribution Point Group. All of this created a Distribution Point, which you can see by clicking Distribution Points down by the bottom of the Administration section. 

Fuzzy text helps no one
Every time you create anything, the next part of the process is to distribute or deploy to this location. Really, it's always an entire extra step. In addition, should you EVER have to turn off the distribution service (which I did twice before the server went kaput) you will have to REDISTRIBUTE EVERYTHING. That much fun. A great way to minimize the frustration of this process is to create a Distribution Point Group by clicking the selection below Administration, Distribution Points. I'm really not sure what the different navigation names are. 

Distribution Point Group Node

I just read the manual. Select the Distribution Point Group NODE in the Administration WORKSPACE. Awesome. Right click the node and Create Group. Give the group an easy to understand name, like the one you use for the Boundary Group. 

Add the DP
Click Add, and check the Distribution Point. OK your way out again. 


By creating this DP group, you can distribute all your content to the group, which takes the same amount of time as distributing the DP itself (read: same amount of clicks), but if you have to take the DP offline for any reason, content automatically redistributes to the DP when you assign the DP back to the DP Group! Very cool. Guaranteed, you appreciate this later. 

At this point, you have a boatload of assets and users in your database. You have all the assets and users assigned to a boundary and a distribution system. With the distribution system we can make available or push software installations, deploy operating systems with applications and even migrate the users profiles. We can deploy updates. We can turn common runtimes into updates and stop having to make a trip to a computer to authenticate the newest installation of Flash or Adobe Reader. 

First thing we need to do, however, is harness in our assets and install the Config Manager Client. 

Before we can do that, we'll want to create accounts for pushing software. Still in the Administration workspace, expand the Site Configuration node, and click the Sites node (subnode?). By simply clicking on the Sites node, the ribbon at the top fills up, even if it takes a second to do so. Remember how you got this to happen, because the ribbon is touchy. On the ribbon, click Client Installation Settings, and then Client Push Installation. 

How many times do I need to click off Sites, and then click it again?
If you don't have any virtual appliances, you could check Enable automatic site-wide client push installation. I don't want the DP to be continually using its resources to install the client on those systems, so I don't use this option. Nevertheless, click the Accounts tab, and add an account with workstation administration permissions by clicking the star, then New Account. We've created a restricted user called SCCMPush in order to avoid security problems, as the user has no access beyond push, but you can also use a workstation admin user account as a backup. Once you've added the accounts, OK OK your way out.

Push it real good
While we're learning how touchy this ribbon is, click on Configure Site Components, then Software Distribution. Ignoring the General tab, the Network Access Account tab lets you specify whether your SCCM computer account or a specified account should be used to access network locations. Some servers have very limited access to other systems by default, and this allows you to set an account to access other servers that SCCM will no doubt communicate with. The process of adding an account is similar to the process used in Client Push. Add any accounts necessary, and OK OK.

OK

At this point I'm going to have this server backed up, in order to preserve the amount of work we've done to get the server running. I'd hate to lose this pristine setup in another catastrophe. 

Ugh
As the backup will take several hours, you're off the hook for the day!

Wednesday, March 26, 2014

Part 3 - CU2, Acceptance, and Humility

Now that SQL is all set, we can begin installing SCCM 2012 R2.

Before we start the installer, you're going to want to avoid a few Ps ITA. First, we need to tell SCCM not to use the C:\ drive for SMS. 

Learned this here.

It may be necessary to turn off "hide extensions for known filetypes" so you can rename the file extension. 

No admittance.
The next PITA is ADK. Download and start the installer for Windows ADK 8.1.

Much like every other installer, there will be some agreement that you can't disagree with. 

Not sure I can accept this
Ten minutes and a few window flashes later, the installer informs you that a reboot is necessary. Jerk. 

Another grueling reboot later, we continue with the ADK installation. Choose your location and click Next. I'm feeling like giving back, so I say yes to the Customer Experience Program and click Next. Another license to Accept. In French.

You will only need Deployment Tools, Windows PE, and USMT. 

Make it so.
Uncheck everything else and Install. 

I hope you brought some snacks.
After the installation is finished, Close.

We can open the SCCM installer and click Install. What else were we here for?

The initial installer screen has some interesting points. SQL is taken care of, but the FQDN is going to be your best friend. If you're here, there's no need to suffer you an explanation, but needless to say, SCCM references files and folders by FQDN paths 95% of the time. One of the things I do to help this is create a shortcut on Explorer for the E:\ drive via FQDN. In fact, I create shortcuts to drives on test computers and storage repositories--it's really that frequent.

If I could make that the default, I would.
After you've reviewed, click Next. Unless you're doing something special, you can actually click it twice, since I'm using the default installation options. Fill in your license information and Next again. Feel free to review the license, then Accept and Next. Accept Accept Accept and Next. 

This is your first chance to try the FQDN rule. I actually have the Prerequisite files saved, but I've pasted the FQDN link, though this is one case where it isn't required. 

This is actually a great example of how to deal with the FQDN rule. Use the FQDN shortcut to the location of the Prerequisite files (or folder), and copy/paste the address. 

Beware the red exclamation point!
Notice the red exclamation point. It informs you whether your path is complete. After you've created and provided the installer with a path for/to the Prerequisite files, click Next. This process downloads about 250MB of freshness required for the installation. After some time it'll bring you to the language selection. I chose English and clicked Next, because "potty mouth" is the only other language I know. Not an option. I do the same for Client Language and click Next. 

Next screen requires a little deliberation. Site code is how you refer to the server. Depending on your deployment, you may option to add additional servers later, and you'll want the reference to be simple. In our case, we have some remote locations, so I choose to call our site DS1 for "Darton Site 1." The logic behind this is that we have only a handful of remote sites that we may option to put such servers. If we had more than 10, I'd likely just make it D01 for "Darton 01," in order to preserve the tens space. Site name is also arbitrary. In this case this Site will be "Darton State College," and the first likely remote candidate will be "Darton Cordele Campus". Doesn't need to be complicated. Nothing else need be changed. Next. 


On the next page, select Install as stand-alone site. Next. Click Yes on the warning, as the settings can be changed when the situation changes. 

The next screen I just leave alone and click Next, since my FQDN pre-fills, and I don't have a need to change the Instance or dB names, nor the Broker port. 


I just click Next on the following two pages as well, because the correct dB and server FQDN information is pre-filled again. 


On the Client Computer Communications page, I am selecting "Configure the communication method on each site system role," as converting multiple servers (if you use multiple servers for different roles) will make this very complicated from a certificate standpoint. This can be converted over to HTTPS later, but my goal is to get the system working first. 

You can't call security every time you get a complicated order.
The next page lets you configure the very settings you unlocked by selecting the alternate communications option. I leave the settings on HTTP (I didn't even have an option) and click Next, since I only have one server at the moment. 

The next page is the Customer Experience Improvement Program. Make a selection and click Next. 

Giving something back.
The following page is the summary. You'll probably get warnings about WSUS, firewall exception, AD permissions, and BITS, but they don't stop us from moving forward. Click Begin Install.

Give it some time.
Might be a good time to go to lunch. According to the installer, it took roughly 15 minutes. Close it out. 

You have now installed SCCM 2012 R2. Open Configuration Manager Console. There's a LOT here to do.

System Center 2012 R2 Configuration Manager
I like to compress the bottom bar after. After using the bottom bar for a month, you get used to the icons. 

Now we'll want to add the WDS and WSUS roles to the server. Go to the Server Manager, Roles, and Add Roles. 

Click
It is important that you do not do any configuration of the server roles–SCCM will not be able to use a configured server role. I probably should have done this before I installed SCCM, and after SQL. I did one final reboot, and now we can move on to configuration!

Looking good!

Not as good as I thought. The Management Point isn't working. For the love of Pete. 

Humility.
 A little search led to a long string of commands to repair it. One it particular is BITS, which I didn't turn on. I went to Server Manger, Features, and turned on BITS for IIS. Already frustrating. Another hour long reboot </exaggeration>. For the win!

Hope.

So things are moving along. By the way, this didn't exactly take me 30 seconds to figure out. I probably pulled my hair for about a half an hour, seeing BITS in multiple lists of exhaustive fixes. They all mentioned BITS, so I turned it on and crossed my fingers. 

When screwing around with R2, I found that it's necessary to install KB2905002

Oh, Reginald–I disagree!
The patch warned me that I should restart the server before installing, so I did. It also doesn't like it if you have SCCM running in the background. 

Much better
Unless you really have a complex setup, you can just click Next repeatedly until it gives you the option to Install. 

I should just say "Chong Li" instead of "Next"
This update will take a bit. After I did this update, I had to do a great deal of busy work re-distributing content, but this being a fresh installation, all that was ahead of us anyway. 

Next thing I do is detect the network and set boundaries. I didn't realize how important boundaries were until I set them up wrongly. 

Go to Administration, and expand Hierarchy Configuration, then click Discovery Methods. 

Discovery options.
Darton has a forest with three domains–one parent and two untrusted sub-domains. For this, I use AD System Discovery. SCCM will only be managing the two child domains, so it is only necessary to add those. 

Seeing the Chong Li picture repeating is distracting.

Opening Active Directory System Discovery, check Enable, click the yellow star, browse to select the container, leave Recursive search and Discover objects checked, and specify an account with AD Read permissions in the locations you need to discover. I choose the top level of each child.* After adding the necessary Locations, I limit the discovery. On the Options tab, to 720 days since last logon (omitting computers that haven't been logged in for two years). The Polling Schedule tab is automatically set to discover every 7 days, which is good enough for me.

*You could go as far as to select individual OUs, but that becomes exhaustive fast. I find it easier to get everything in each child domain, and then use inventory grouping to sort them into managed and unmanaged groups. It's WAY easier than trying to limit what you detect, especially considering how entries don't come back out of the database without a great deal of effort.  

Self discovery?
Once you click OK (or Apply then OK if you're OCD), a popup asks if you're ready to start discovery. Why not? This process will take ages, but runs in the background and doesn't intrude on anything else. 

I also use Forest Discovery (I accidentally said Network when I first wrote this) to find the network boundaries. Opening Network Discovery, Enable, and check both Automatic options. This actually only takes a few minutes to detect the Boundaries, but we'll do it in the morning.

Next, go to the Active Directory Forests under Hierarchy Configuration, and add the subdomains. By default, it adds the domain that the server is on. Right click and Add Forest. Add every forest individually like you did for the previous entries. Ignore the domain account, which is only for Forest Discovery, and check the site name on the Publishing tab. Ignore the bottom checkbox unless your domain has trust, allowing domains to search other domains for the site server. 

Forestry
While I was preparing the previous portion of this blog, it was scanning the domains for devices, which can be seen on the Assets and Compliance section, under Device Collections. 

Virtual devices bloat the numbers
This took me through to the end of the day. The system will continue to accumulate and learn and understand about the domain you run overnight. We'll see how it looks in the morning. 

Tuesday, March 25, 2014

Part 2 - NEXT (Windows Server and SQL installation)

Darton State College is an institution with roughly 1300 computers, 200-300 VMWare boxes, a boatload of servers, and roughly 9000 users.

Historically, we've been using Ghost Solutions Suite 2.0 to image machines. Unfortunately, even with the well designed golden images I've created, flash drives with automatic computer name and just the right drivers for our 95% Dell deployment is still just way too much to manage for such a small group of technicians. We have other things to deal with.

Our SCCM site server is running on VMWare virtualized hardware. I'm not keen on the details, but I use vSphere to manage the system.

I initially tried running with 8GB of RAM, but SQL dragged. Upgrading to 12GB of RAM gave me a modestly peppy system. This time, I'm going to go with 20GB, just to see if it makes a difference.

The processor was previously set up with eight total cores on two sockets. Not sure if the virtual hardware system actually pulls the cores from different batches of hardware, but I figure it's nice to have independent whatever if it happens. I like that configuration.

Right off the bat, dealing with booting in to the DVD was a pain. I couldn't either get to the boot prompt or at least couldn't see that I was getting to it. vSphere via RDP from a MacPro can make basic maneuvers three steps more complicated. I first tried to use a datastore ISO, but I'm not sure it's the ISO I need, because there's no information there.

Decided to use Burn (on Mac) to rip the Server 2008 DVD.

You have to configure vSphere to boot to bios so you can boot from DVD.

We use Server 2008 R2 Enterprise (64-bit). It is probably the slowest booting operating system ever designed, so try not to have to reboot your server, if possible. It requires a ridiculous Administrator password that requires letters, numbers, body measurements and your social security number, encrypted with SHA256, as well.

Set up VMWare Tools if you are virtual. This doesn't speed up the boot time, by the way.

I had to manually set up network and change the name.

Ready to add to the domain!
After adding the computer to the domain, you'll want to add your domain account as administrator.

You'll also want to add Chrome, because you WILL have to download software.

Because IE Enhanced Security is a pain.
I left here to go to lunch–it really took that long to install and get the server on the domain.
Tuna and crackers, but not as fancy as this picture I Googled.

Ask your domain admins to add a container called "System Management" to the System container in all the domains you'll be managing. Full control over the folder needs to be delegated to the SCCM server, as well. In my case, this has already been done.

Now it's time to add server roles and features. Click the Server Manager icon on the task bar. Now Roles and Add Roles.

You're going to add the IIS role for now.

Next is selecting Role Services.

Adding to the defaults, check HTTP Redirection, ASP .NET (which adds three extras), ASP, Logging Tools, Tracing, Basic Authentication, Windows Authentication, Request Filtering, IP and Domain Compression, IIS Management Scripts and Tools, Management Service, and IIS Management Compatibility (which checks all sub-items).

This really is kind of crazy, so I made a screenshot.

IIS's Role Services should look like this.
Next and Install. It says the server may need to be restarted afterward, so I hope you brought some snacks.

I got one warning upon completion--it wants me to turn on Automatic Updating (Windows Update for server?). Aside from this, close the installer.

Now go to the Features tab, under Roles, click Add Features on the right, expand .NET Framework 3.5.1 Features, and check .NET Framework 3.5.1, expand BITS and get BITS for IIS (I realized I missed this in Part 3), then scroll down and get Remote Differential Compression, Next, and Install.

Next we install SQL Server 2012 SP1. Run Setup and authenticate. Click Installation on the left, and then, "New SQL Server stand-alone installation or add features to an existing installation."

SQL Server 2012 Setup does some craziness with Setup Support Rules–click OK when it's done. It might take a minute for the next screen to pop up and ask for the product key. Then it goes through licensing and updates, mostly just "next next next."

The suspense is killing me!
Eventually, after installation and some updates, Setup Support Rules comes back up and tells you everything went fine, but warns you that Windows Firewall is ridiculous. We'll fix that later–I've compiled an equally ridiculous list of firewall ports and rules. For now just hit Next and Next (SQL Server Feature Installation is selected by default). In a far less intimidating list of checkboxes, select Database Engine Services, Reporting Services - Native, and Management Tools - Basic (which auto-selects a sub item). Hit Next when you're satisfied with your selections and Next after the system check.

SQL Feature Selection
I put my dBs on secondary storage. Could be faster, but at least it's SAS with native queueing. Next and Next. The administrator gave me a specific user just for domain SQL service, but I keep deleting the information for security reasons, and it's hard to pin him down. Use the local authority account for now, and set startup to Automatic on all accounts. Don't touch the Collation tab and click Next.

File under "dirty shortcuts."
On the next screen, it complained about the local user; I added myself as an SQL admin, as a result. Leave the other tabs alone, again, and click Next.

It's like the crime shows where they blur out your face. 
Leave Install and configure selected and click Next again. Next next next and install (I got no errors on the last check).
Mad props to Bolo Yeung.
SQL installation gave me a chance to organize my next day.

After installation, you have to reboot the server. You might need run Command as administrator in order to tell the server to reboot using

>shutdown /r

That'll take a few minutes, then you reconnect to the server and pull up MS SQL Server Management Studio. 

Right click the machine object and click properties. Go to Memory on the left. 
The server likes to be limited in memory footprint. I suggest leaving a MINIMUM Minimum of 2GB, optimally I'd suggest 8GB (8192 in MB). For the Maximum, I suggest you subtract a healthy minimum for EVERYTHING ELSE from the total RAM. In my case, I want to leave 6GB for everything else, so I calculated 14336MB for my Maximum. Like I said, the system ran fairly well with 8GB of ram TOTAL, so you can infer your own choices from there. Arbitrary!

Fantastic math!
Tomorrow we'll pick back up with installation of SCCM 2012 R2 proper. About time, right?

This process and blog left me with about 30 minutes left in my work day, add a few minutes where I was taken away from process to help walk-in instructors.

Monday, March 24, 2014

Part 1 - Saying Goodbye

Kind of feels like starting at the end. I'm preparing to say goodbye to all the work I did.

The server is running. It seems to be alright. But a week and two days ago, I was RUSHING to add as many applications as I could. I'd created installers for Office 2010, 2013 (each with two versions), .NET fx 4, Java, OMCI (we have a 90% Dell campus), Chrome, iTunes and Quicktime. I was working a mess of Adobe stuff, and a test installation failed in an unusual way. Couldn't download? I thought I was over that.

And then PXE failed.

What? I was nearly ready to deploy faculty and staff systems.

Needless to say, a rebuild of the distribution role later, the problem had become only more apparent.

So now, I'm exporting the applications in the hopes that it'll be one less thing I have to do on the other side.

Tomorrow, it begins (again)!